Showing posts with label Visible Image stamps. Show all posts

Friday, 19 June 2015

' Over the Rainbow ' Chipping Sodbury Festival workshop 2015

Welcome back.
 Today I'm sharing the project my half of our Out Of The Blue craft group made for the Chipping Sodbury Festival.
Every year in June, over the period of about a week, the town & community get together to share various events in the town.
There is always a theme & the week culminates in a Street carnival complete with floats & a carnival princess!.
This year's theme is 'Musicals' & we decided to choose The Wizard Of Oz as the theme for our card making workshop which took place yesterday evening.
The perfect stamp set for the occasion was yet another from Visible Image, my current stamps of the moment!.

Here's the card my half of our crafty group made


I loved colouring Dorothy with my Inkense pencils. They give such vibrant colour results & for this particular image I much preferred the effect of these watercolour pencils in comparison to another Dorothy that I had coloured using promarkers.
The design for the yellow brick road & scenery was created using a Sheena Douglas mask & the Brick Wall stamp from Visible Image.
For the grass I used the Tall Grass stamp & the Winter Tree stamp for the trees.


Distress inks used were Shabby Shutters, Pine Needles, Mustard Seed, Festive Berries, Peacock Feathers, Chipped Sapphire, Dusty Concord.
Dorothy's ruby slippers were embossed with Stampendous red glitter embossing powder & touches of red stickles added the final touches to the trees & poppies.


Everyone really enjoyed the Workshop & we are now planning the projects for July & August dates.

Thanks for stopping by, hope you all have a fab weekend. I have a rare Saturday off as its Daisy's first time on the float for her infant school. Can't wait to see all the little ones dressed up as Umpa Lumpas from Charlie & the chocolate factory!!

Amy x 


Monday, 15 June 2015

You Rock Finley!

Hi everyone, sorry its been a while since my last post.
 Things have been busy as usual in the land of Out Of The Blue with lots of sorting & planning for our Summer Sale which is coming up shortly.

Also in June we will be holding our card making workshop for the Chipping Sodbury Festival. This year's theme for our workshop is The Wizard Of Oz for which we'll be using stamps by Visible Image.

Today, the card I'm sharing was also made with Visible Image stamps. You may have noticed, I'm really enjoying using their stamps at the moment!?. 


This card was made for my Godson Finley for his 10th birthday.
His mum asked if I could make it so that after his birthday it could be framed to hang in his bedroom.
His favourite colours are red & green so, of course I had to incorporate those. 
I used the Max Rocks stamp set, promarkers to colour Max, Brusho paints, distress inks, Time Holtz alphabet stencil & Visible Image Grunge Check Background stamp.


I really enjoyed making this card and hope you like it too. 
Brushos are fun to use & are featuring on lots of blogs at the moment.
 We are now stocking them in the shop so it was great to get my hands on a set of 12 colours & have a bit of a play around with them. Watch this space for more projects featuring Brushos!.


Thanks for stopping by & I promise to be a better blogger & make a massive effort to check out what you've all been creating since my last visits & comments.

See you again soon

Amy x 

Thursday, 28 May 2015

Out Of The Blue all day workshop with Visible Image & Pauline Butcher.

Welcome back, thanks for dropping by & joining me.
It's been a busy old time for us at
 Out Of The Blue.
In the last 2 weeks we've held 2 of our own evening workshops & also hosted an all day workshop with Visible Image & Pauline Butcher at the Compass Inn.
It's the first time we've hosted a workshop for the whole day & I'm pleased to report that it was a great success.
Everyone thoroughly enjoyed the day which was packed with lots of crafty tips & techniques from Pauline, a roast dinner!, & lots of products to buy including Visible Image stamps brought along by Helen & Mark.

I was able to join in too which was lovely & here's what we made


We also had time at the end of the day to play around with some Brusho paints & tags that Pauline had brought along.
Everyone loved getting their hands on these & were amazed at the results. I'm pleased to say we now stock Brushos in the shop & they are already proving to be very popular.

Here's the tag I made


& here are some that some of the other ladies made


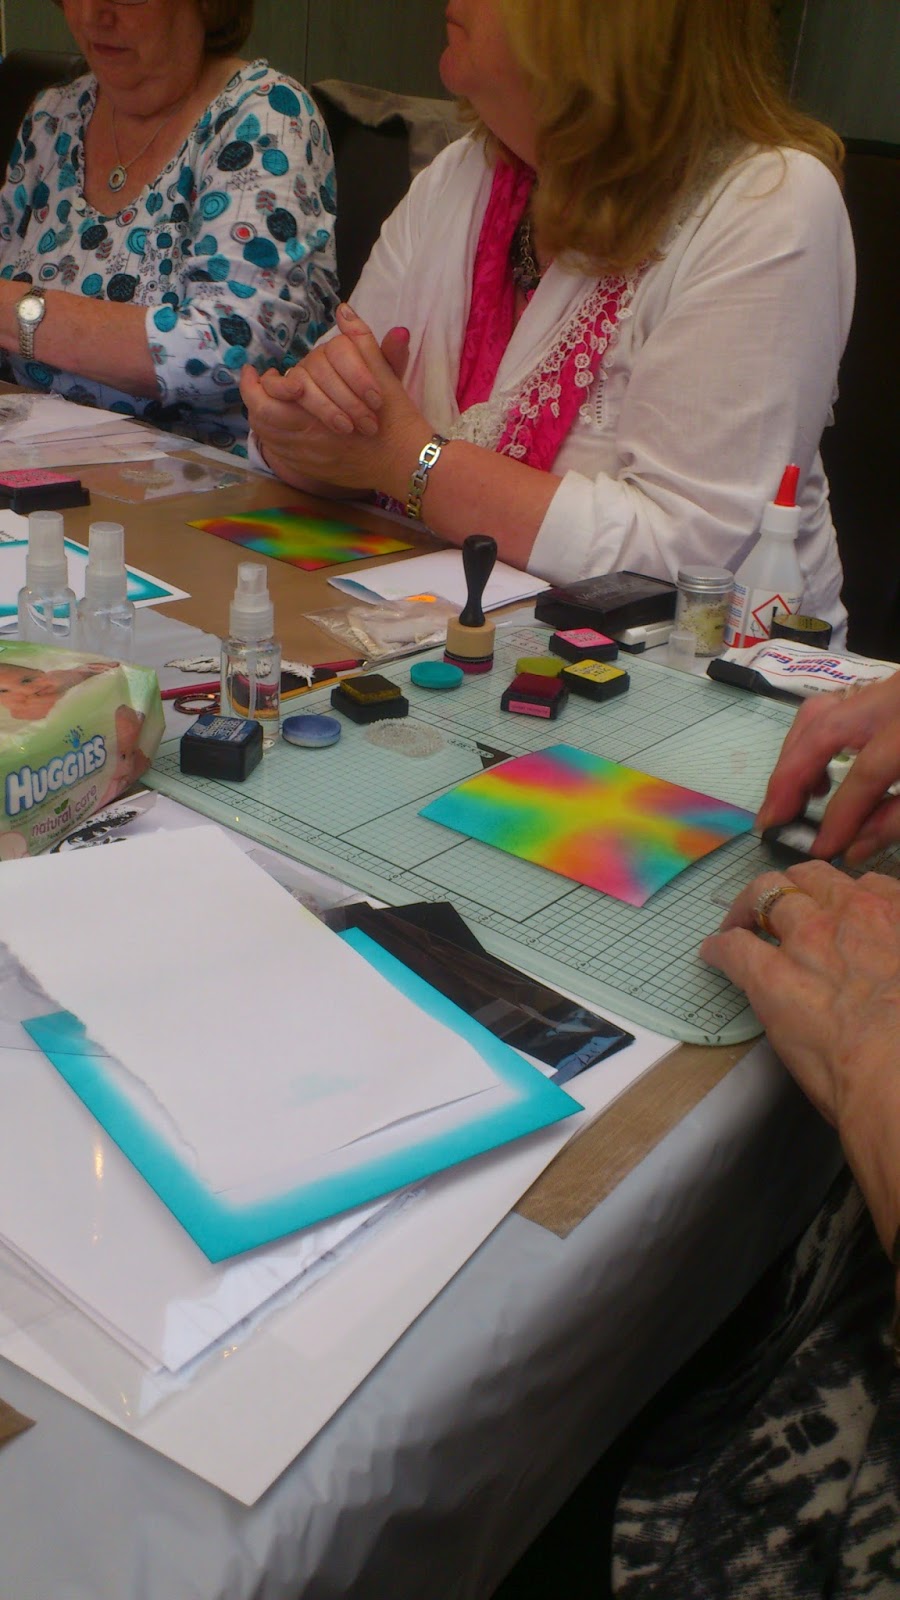
Here's some pictures from throughout the day


We are now planning another all day workshop for later on this year so watch this space or email me for details if you are interested in attending amyj.rus@gmail.com

See tou again soon

Amy x 


Friday, 15 May 2015

Classic Car

I've just got home from our Out Of The Blue workshop.
Even though its been a long day I still need to sit down & unwind before I head off to bed.
So, I thought I'd write this post & share with you the projects we made this evening.


With Father's Day coming up in June we thought we'd have a Father's Day/male card theme.
We used Visible Image stamps to create our cards.
Classic sports car was the main feature with Tyre marks, Grunge Check background & Metal plate forming the background.
Our group had the choice of which sentiment to use, Live the life you've imagined, No matter your age you'll always be a classic & & Father's Day Stamp set.

Everyone enjoyed making the cards & we actually finished ahead of time!, we quite often overrun past our 2 hour workshop time so this meant we were able to sit & enjoy our tea & cake & have a bit of a crafty chat.
We had 4 new crafter's joining our group so it was a good opportunity to get to know them too.

This month we celebrate 3 years of holding our card making workshops.
It's great to still be introducing new crafter's to our group & sharing all of our crafty little ideas with each other.

Thanks for visiting my blog & leaving me your comments which are very much appreciated.

Amy x 

Wednesday, 29 April 2015

Singing Star

Welcome back blog friends.
Its mid way through the week & I for one am looking forward to the bank holiday weekend ahead.
Not much planned at the moment other than working Saturday & then relaxing with the family Sunday & Monday.
Maybe I'll be able to fit in a bit of craft time somewhere too!.

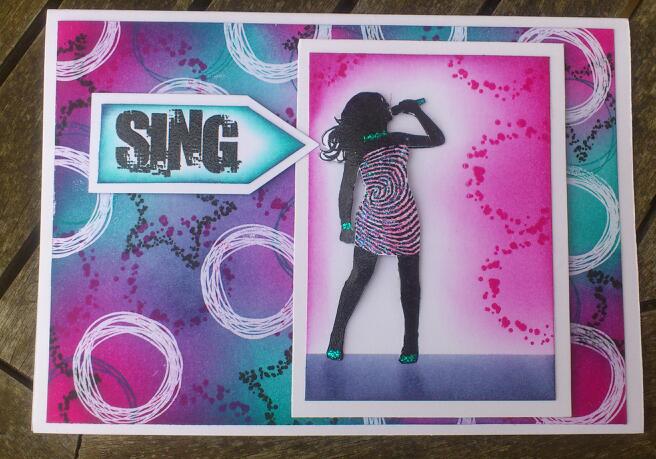
Today I am sharing a card I made using Visible Image stamps Sing, Galaxy & Soul Music


This card is currently sat on the shelf in my shop right next to the stamps themselves. I'm sure it won't be long before we need to reorder as these are lovely stamps to work with & Helen & Mark's range of designs is great.


The singer was stamped onto white card in black ink & heat embossed. I used black soot distress ink to blend around her & the galaxy stars are stamped in black & heat embossed in silver.
I stamped the singer again & filled in the lines on her dress with a sakura pen & then cut her dress out, shaped it & stuck it into place on top of the original dress to add dimension.


I stamped & embossed the black background card with the music from the Soul Music set in silver embossing & added a touch of treasured silver gilding wax around the edges.
I stamped the Sing sentiment, mat & layered it & stuck it into place in the top right corner of the card.


We are really excited to be hosting a special day of crafting with Visible Image on 17th May at a local hotel & restaurant.
Its going to be a fab day with a Sunday roast included too, yum!.

The very talented Pauline Butcher will be teaching the workshops on the day & Helen & Mark will be coming along bringing lots of their lovely stamps to sell.

Here are all the details, if you fancy joining us please get in touch on the number below.


Thanks for stopping by
See you soon
Amy x 


Thursday, 1 January 2015

Imagination Crafts Inspiration 1st January 2015

Happy New Year!! & welcome to 2015!.
I hope you all had a great time last night seeing in the New Year?.

Today I'm sharing my inspiration project for the Imagination Crafts Challenge Blog. 
Each month there is a new challenge with a prize to be won & the theme is always 'anything goes'.
Please pop on over to check out the projects by the other DT members & join in with the challenge too.


To make my card I cut a circle in the centre of the card & on the waste I used the Butterfly & Daisy stencil with black stars Sparkle Paste.
I then used the same stencil & paste on the front of the card blank, masking areas where I didn't want the design & then I reversed the stencil to mirror the image so that the daisies are leaning inwards.


I stencilled just the butterflies onto clear acetate & when completely dry I cut them out & creased them along the length of their bodies to make them 3D & attached them to the front of the card either side of the circle.
I blended black soot distress ink around the edges of the card & circles.


I cut a strip of white card onto which I stamped the sentiment from Visible Image & layered onto black card.
I shaped the card with my fingers to make it have a kind of wave effect & then stuck it into place at the top of the card to finish.


I hope my card has inspired you to take part in the challenge.

I'll be back again soon, thanks for stopping by.

Amy x 

Thursday, 11 December 2014

Dinkie Snowman pop up card

Welcome again blogger friends.

Thank you all for your birthday wishes, I really enjoyed my birthday although it all passed by so quickly & now I'm trying to concentrate on Christmas.

I was so excited to find that I had won the Visible Image November Challenge with my Butterfly pop up box card!
My first ever blog challenge win! :-) .

I've already spent my £20 prize on the Visible Image website & am eagerly awaiting the arrival of my goodies in the post.

In celebration, I thought I would share another pop up box card with you today.
This time it features stamps from Indigoblu.


Here I have used the Snowman dinkie, I wish you a merry Christmas dinkie & the A6 baubles flourish stamps.


Once constructed, the box card panels were decorated with the stamped images coloured with peacock feathers & faded jeans distress inks.
My snowman was stamped in black ink & coloured with promarkers. 
The snowflakes were fussy cut from the baubles flourish stamp & stuck onto clear acetate stalks to look as if they were falling snow.


I also added some snowflakes made with spellbinders & some touches of stickles glitter glue here & there for some added sparkle.
This all folds flat enough to fit inside an envelope ready to post or give to your recipient.

Thanks for looking, I'll be back again soon with some more Christmas makes.

Amy x 

Tuesday, 11 November 2014

Flutterby Butterfly

Hello & welcome back.
 Phew! What a busy week its turning out to be.
 This week we are hosting our annual Christmas Shopping Evenings at Out Of The Blue, with last night being the first of the 3 evenings. 
I was kept very busy running up & down the stairs, topping up items that had sold, chatting to our loyal customers & handing out festive drinks & nibbles.
Looking forward very much to the next 2 nights which are no doubt going to be just as busy, so I thought I'd grab these few spare moments to share my card with you.

It's a pop up box card that my half of our workshop group made a little while back using Visible Image  stamps.
Visible image design & make all their own clear stamps so if you're not familiar with them, please check out their fab products, some of which we are very pleased to stock in our shop.


I've used 4 stamps by Visible Image, Large Butterfly, Butterfly, Butterfly Sentiment & Tall Grass.

I used a template to create the base box card out of a sheet of A4 cream card. There are lots of instructions on how to construct pop up boxes of varying sizes available on YouTube etc.
 Once constructed & decorated the card folds flat enough to fit inside an envelope.
 I created my own background paper by making a piece of A4 card wet & then using Cosmic Shimmer Water Paint Garden Tones set & applying the various colours in patches.
Once dry the background has a beautiful shimmer to it.
I then stamped the 2 sizes of butterfly stamps randomly with distress inks that toned in with the shimmer paint.
The A4 background card was then cut into panels, mat onto lilac card & applied to the panels on my base box.


I stamped & embossed 3 large butterflies & 4 small butterflies & painted them with the same Cosmic Shimmer paints & cut them out.
I added distress glitter to the butterflies & made antennae from craft wire with tiny beads on the ends.
I stamped & embossed the Tall Grass onto lilac card several times & then cut around it & glued it inside the inner supports inside the box & onto the back panel.
The butterflies on acetate were then glued in & around the grass so they appear to be fluttering .


I stamped the Butterfly sentiment on to the offcuts of my background sheet & chopped it up, attaching it to the very front panel with 3D foam pads.


It was great fun making this card & although it was maybe a little time consuming to complete within the 2 hour workshop timescale, many of our class members came back to show more pop up cards they had then made at home based on this design.
These butterfly stamps are some of my favourite stamps to use & are great for lots of occasions.

I'd like to enter this card in the Visible Image November Challenge.

Thanks for visiting
See you soon

Amy x