Showing posts with label Promarkers. Show all posts

Thursday, 23 July 2015

Thank you teacher


Hello & welcome back. It's been a while since my last post so I have a few projects to share with you over the next couple of weeks.
 I've been pretty bad at checking out what you've all been up to lately too, so now that the school holidays have arrived I'm hoping to catch up with you all very soon. 
It's just been such a hectic time lately!.

My daughter Daisy has just finished her first year at infants school. As a thank you to her teacher & teaching assistant the mums all clubbed together to buy vouchers. 
Daisy also wanted to make something a little more personal for them just from her so here is what she made for them - with a little bit of help from me!. 


We made these 2 hanging canvases. 
Each was painted with turquoise chalk paint & then embossed with the leaf pattern using  grunge paste through a leaf mask from creative expressions.
While the Grunge paste was still wet I sprinkled it with one of the gorgeous new colours of embossing powders by Wow! called Long Island Teal which we are now stocking in the shop along with the other new colours.
This was then heated with a heat tool causing the paste to bubble & the powder to sink in & also end up with a layer of gorgeous gold sparkly teal on the surface.


We stamped branches & owls & coloured them with promarkers.
These are both stamps by Creative Expressions.
We coloured 3 owls & cut & layered them up with 3d foam.
The little punched heart was also heat embossed with one of the new powders from Wow!. This colour is a fab pinky red called Florida Sunset.
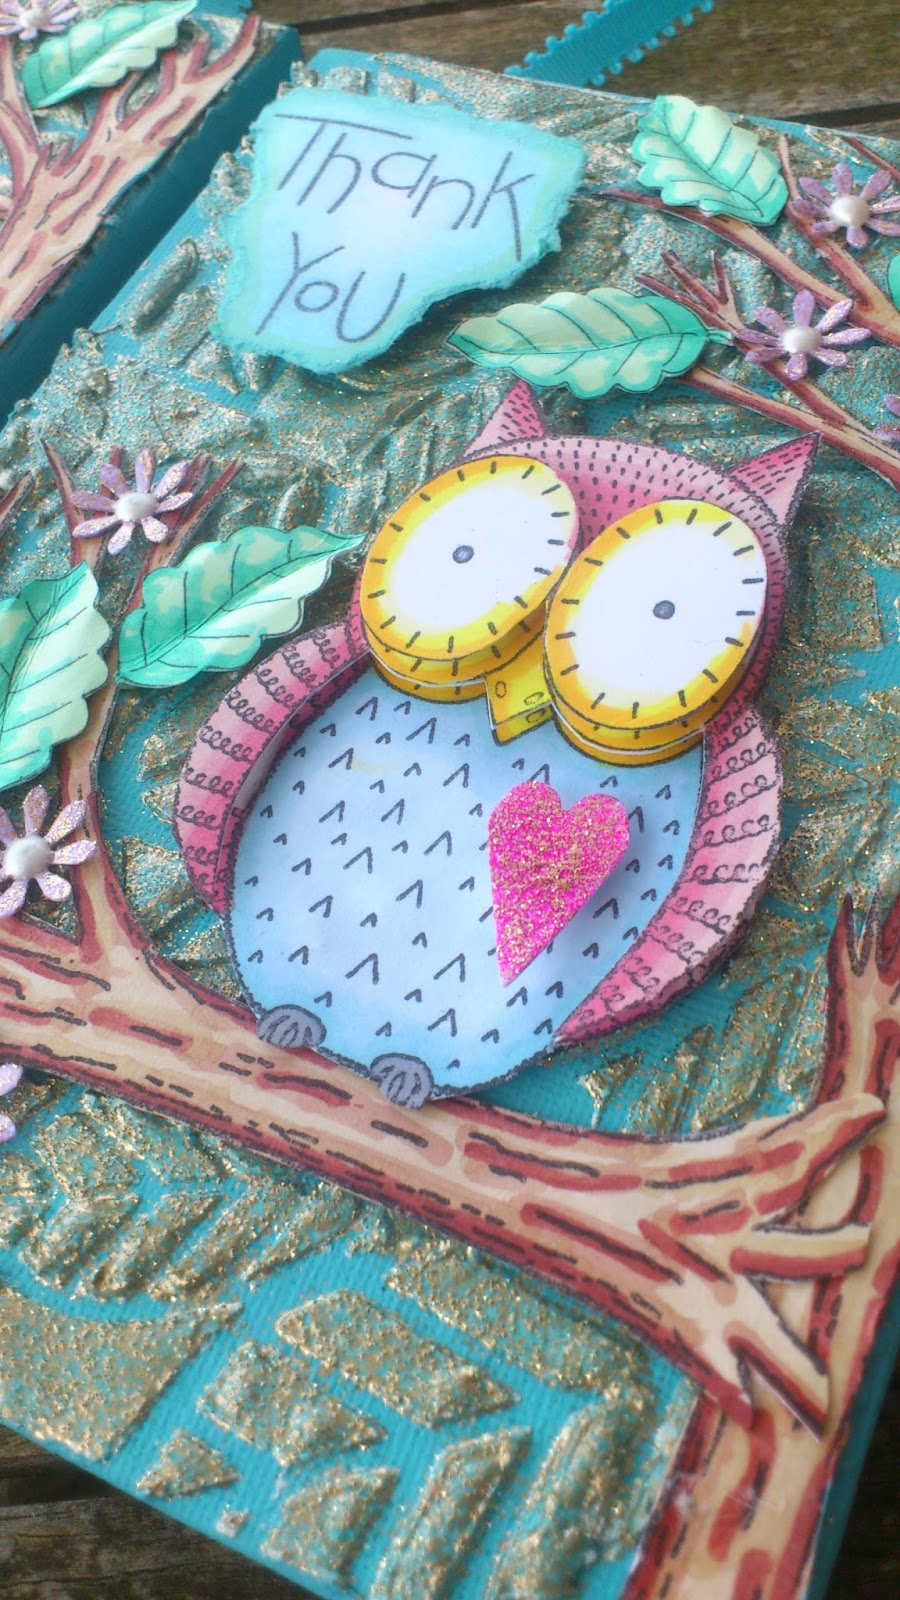

To finish, we added the 'thank you' sentiment made using a Wow! stamp, some stamped & coloured leaves & some small punched flowers embossed with Wow! Mulberry mist with pearl PVA centres.

Daisy wanted to write her own message on each of them so I drew some lines on some turquoise card & once she'd written what she wanted to say, we stuck them to the back of each canvas with some ribbon in between to hang.


Thanks for taking the time to visit my little blog.
Please leave me a comment if you can as I always read them & they are greatly appreciated.

See you again soon 

Amy x 

Sunday, 15 March 2015

Happy Mother's Day, you're blooming marvellous!

Evening bloggers, I hope you've all enjoyed your weekend. 
For those of you who are Mums, I wish you a Happy Mothering Sunday, hopefully you've been pampered & received gorgeous gifts & cards.

Here's the Mother's Day card I made for my Mum.


It features the Mini Flowers stamp set from Woodware.

This stamp set is very versatile & suitable for many occasions.

Here I have stamped each flower onto white card stock with black archival ink & coloured with a combination of promarkers, the new Spectrum Aqua Pens from Crafter's Companion and a touch of gold cosmic shimmer shimmer paint 
from Creative Expressions.

I cut out each flower & shaped them with my fingers. I snipped into the top right flower to create fronds.

The background was created by embossing a piece of duck egg card stock with  a Creative Expressions mask  inked lightly afterwards with peacock feather distress ink & highlighted with a touch of Treasure Gold gilding wax.


I hand drew the flower stalks directly onto the card with a pigma micron black fineliner.
 The leaves & smallest 'pointy' flower were also hand drawn onto white card stock & coloured with promarkers, cut, shaped & stuck into place with cosmic shimmer dries clear PVA glue.


The 'Happy Mother's Day' banner was stamped onto cream card, inked around the edges with peacock feathers distress inks, mat & layered onto orange card, shaped into a wave with an inverted v & glued top right of the card.


I also lightly decorated the inside of the card too.


Thanks for visiting

I would like to enter this card in the following challenges:


Thanks for visiting & for all your lovely comments as always.

Amy x 

Tuesday, 9 July 2013

A very vintage birthday

Hello bloggers!
 Well, I hope you've all been taking advantage of the fab weather we've been having? It's just what we've all been waiting for & I spent my Sunday out in the park all day with friends & family enjoying a picnic & playing rounders ( badly!).
 
Today's post is the project my group will be making at our card making workshop this Thursday & the following Thursday.
Twice a month my shop 'Out Of The Blue' holds workshops where Carole & I teach a group of 16 ladies. 
 Our workshops have been running for well over a year now, still going strong & growing all the time.
 
 
We'll be using Crafty Individuals  ''Hats and Bonnets' stamp and also their 'Floral Frame' mask to create the background.
The image was stamped in black memento ink on white card & coloured with promarkers. I also filled in all around the ladies with a grey promarker & outlined them with a darker tone of grey to make them stand out a bit more.
Then I distressed around the edges of the card with seedless preserves, milled lavender, shabby shutters & bundled sage distress inks & mat & layered onto card that I'd edged with a promarker to tone in.
I positioned the mask onto some glossy white card stock & inked through only the top right section with the above colours. I then repositioned it & did the same with the bottom left section so that my stamped image sat nicely within.
I found that the inked areas had a more defined edge by using glossy card but that once the ink had sunk into the surface I was unable to add any more colour or blend, so I added each colour a bit at a time.
Once I removed the mask I blended the two greens all over the remaining white areas.
 

Next I cut & embossed two medium spirals out of the glossy card with my Bitty Blossoms Spellbinder I blended with the same distress inks as before & added leave cut with my Foliage Spellbinder. These were then glued into the corners of my card.
 
 
I stamped the sentiment in black, again on glossy card & blended with distress inks & edged with promarkers & positioned it to the lower left of my card over a strip of lilac crochet ribbon.
The whole thing was then layered onto white card edged with a promarker & then onto a white card blank.
I think our ladies will enjoy using this stamp on Thursday, it's got a very classy, vintage feel to it which I really love & we've not really used masks very much so far.
 
Please pop over to Carole's blog in the next couple of days to see what her half of our group will be creating with the same stamp & photos of us all on the night.
 I've had a sneaky peek at her card & it's gorgeous!
 
Thanks again for stopping by, hope you like my card & as always I'm very appreciative of your comments.
 
Amy x


Monday, 3 June 2013

Poppy Heart

Well I don't know where that last week went, & now we are into June!
 At least we are now experiencing some Summer weather at last & I'm pleased to say our camping trip over the bank holiday was a great success due to the sun shining.
 
My post today is a wooden heart decorated with blazing poppies in blues.
Both the MDF heart & Poppy stamp are from Indigo blu.
The sentiment is a Creative expressions stamp & the butterfly stamp is one by Kanban that I've had for ages.
 
 
I gave the heart a layer of white gesso & when dry applied a layer of aqua acrylic paint.
I then stamped the Blazing poppy directly onto the heart with black ink & coloured areas with promarkers .
The areas around the image & the particularly the edges of the heart were sanded back to reveal the white underneath.
I stamped the poppies onto white card & coloured with promarkers, I then cut them out & shaped them with my fingers to make them look more 3D.
These were then stuck onto the flowers on the heart with cosmic shimmer pva glue. I did the same with the butterflies & added stickles glitter glue here & there & gold cosmic shimmer pva dots in the centres of the poppies.
The sentiment was stamped in black & heat embossed with clear embossing powder.
Lime green ribbon to hang finishes the heart.


Thanks for visiting my blog, please pop by again soon to see what we're up to in our next workshops, the next one is this Thursday & we will be using Crafty Individuals Stamps.
I'm off now to get packs together for our group of crafty ladies.
 
Amy x