Friday, 20 November 2015

Follow Your Dreams Esme

Well Hello there!
As you've probably noticed I've been missing for a while.
It's been a busy old time since my last post with preparations for Christmas in the shop.
The gift side of the shop goes a bit mad at this time of the year & we also hold our annual Christmas Shopping Evenings at the beginning of November. Not to mention half term holidays in October & Daisy's birthday party which I was brave enough to host at our house!!.
 
 
My project I'm sharing today is a Birthday card for my friend's daughter who turns 6 this week.
You may remember my card for her brother Finley featuring the Max Rocks stamps from Visible Image.
For this card for Esme, I have used the Fairy Dance stamp from Stampendous.
 
 
I wanted to keep this card very girly as it is going to be put in a frame & hung on the wall in her bedroom. So of course it had to be pink, purple & sparkly.
This stamp was the perfect image as when us 2 mums get together Daisy & Esme are forever dancing & twirling around in pretty dresses practicing their ballet moves!.
 
 
The image was coloured with my Inktense pencils & an extra skirt added over the top of the original to add dimension.
The Follow Your Dreams sentiment from Visible Image was stamped over a blended Distress Ink sky & foliage was stamped down the edges in green using a Lavinia stamp.
 
 
The image was layered onto white card & a background made with Brushos. The larger background was a mix of picked raspberry & dusty concord over stamped with a rose design, also from Stampendous.
I embossed around the edges with sparkly pink Wow! embossing powder & added a cluster of flowers & leaves & of course, lots of stickles glitter glue.
 
 
Thanks for visiting.
I hope to be back again very soon.
 
Amy x


Thursday, 3 September 2015

Summer smile

Hello there blog friends & Hello September!.
I can't quite believe Autumn is almost upon us.
Although I'm not quite ready to say goodbye to Summer, I have to admit, I have been enjoying getting back onto a routine with school runs & set hours working in the shop this week.
It's also lovely to have lots of new goodies arriving in the shop for the Autumn/Winter season & I really do love all the colours this season will bring.

Today's project is a card made using the Chrysanthemum background stamp from Wow!, clear embossing powder & Distress Inks.


The background was stamped twice onto white card with versamark ink & clear embossing powder. 
Chipped Sapphire, Picked Raspberry & Peacock Feathers distress inks were blended randomly over the background.
I selected some of the flowers from one of the backgrounds & cut them out to layer together to make the flower embellishment.
I stamped the smile sentiment onto a strip of card with blue archival ink & blended the distress inks around the edges after cutting an inverted 'V'.
The strip & embellishment were then stuck in place onto the background which was then mounted onto a matching layer & then the card blank. A droplet of Cosmic Shimmer Pearlescent PVA glue was added to the centre of the flower to finish.

Very easy & relatively quick to make but quite effective.

Thanks for stopping by, please visit again soon, your comments are much appreciated.

Amy x 


Thursday, 13 August 2015

Clean & Simple designs for Out Of The Blue

Hello again blog friends.
Today is Thursday & also the day we hold another of our Card Making Workshops at Out Of The Blue.
We held the same workshop last week with the theme of CAS cards - clean & simple.
This is not a genre of card making I normally turn my hand to very easily as I sometimes struggle to know when to stop adding more to my designs. 
Less is generally more with clean & simple cards along with a good amount of white space.
However, once I sat down & got started making my samples for the Workshop, I really got into it & was pleased with the results. 

So, here's what we've been creating for our August workshops


These cards are all A6 in size & made using the Flower Head Stamp set from Woodware & Color box cats eye que ink stacks in various colour combinations.
These stamps are great as they stamp a solid flower so no colouring is needed as the ink does all the colour work for you!. So, dead easy & quick too!.
We used masking techniques to layer the flowers one behind the other & some of the flowers had more than one colour ink applied.
Finishing touches were stickles glitter glue, faux pearls, ribbon & cosmic shimmer pearlescent PVA glues. 
I'm particularly liking the Decadent Teal & Decadent Grape colours in the range by Phil Martin & have ordered other colours, due to arrive in the shop today.
We intend on completing at least 3 cards each if time permits but there's always lots of chatter & tea & cake at our workshops so we'll see how it goes!.

Thanks for stopping by
See you again soon


Amy x 


Thursday, 23 July 2015

Thank you teacher


Hello & welcome back. It's been a while since my last post so I have a few projects to share with you over the next couple of weeks.
 I've been pretty bad at checking out what you've all been up to lately too, so now that the school holidays have arrived I'm hoping to catch up with you all very soon. 
It's just been such a hectic time lately!.

My daughter Daisy has just finished her first year at infants school. As a thank you to her teacher & teaching assistant the mums all clubbed together to buy vouchers. 
Daisy also wanted to make something a little more personal for them just from her so here is what she made for them - with a little bit of help from me!. 


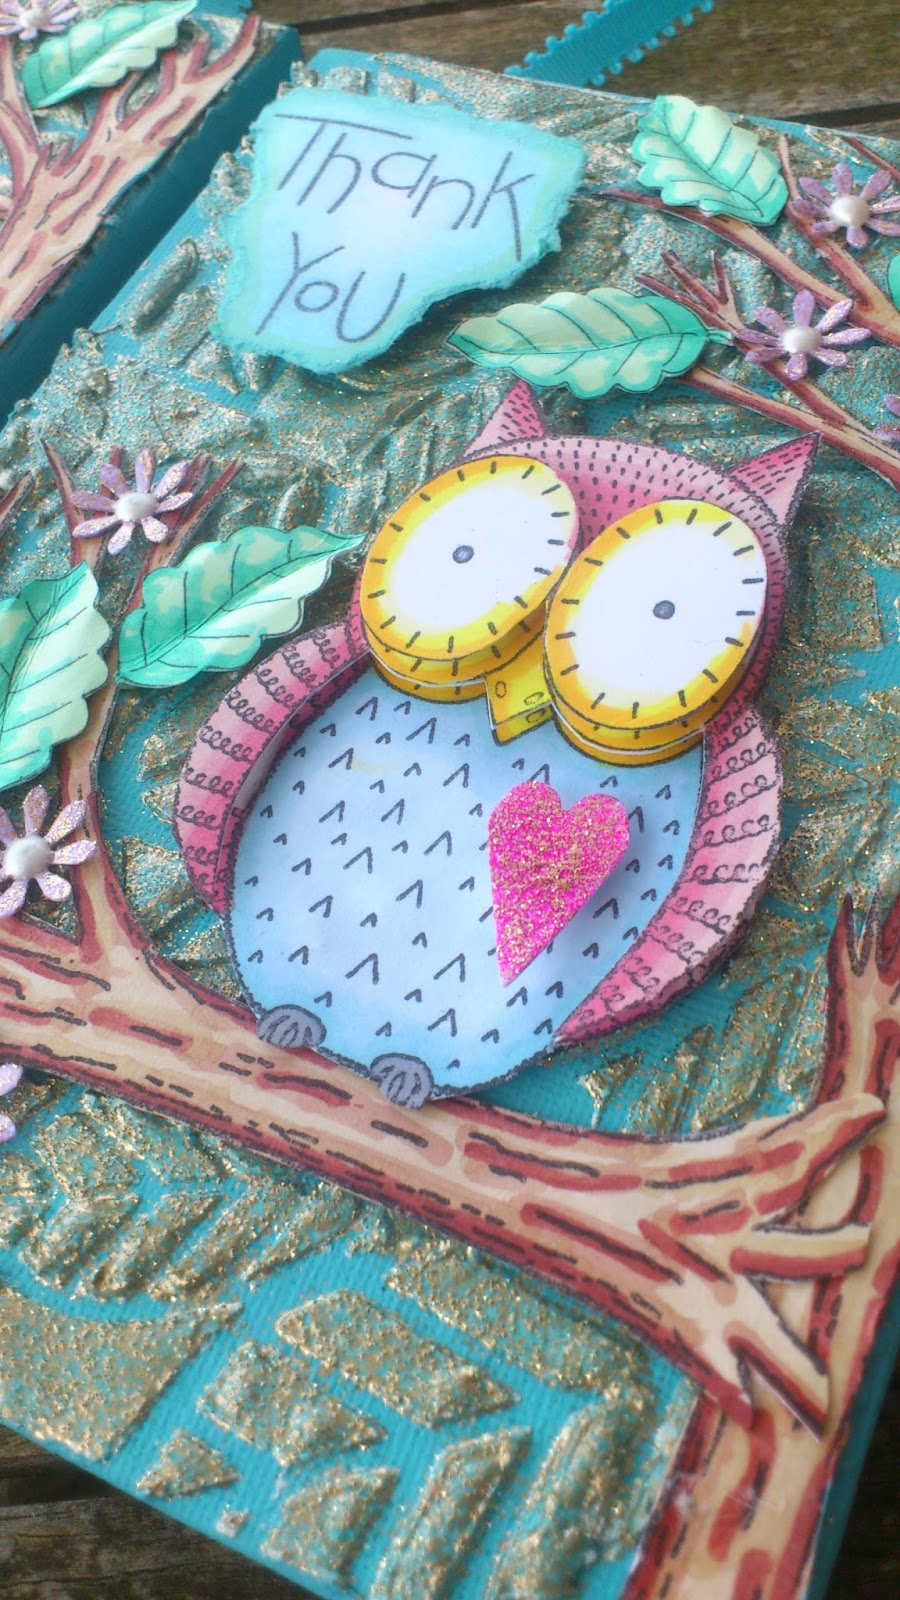
We made these 2 hanging canvases. 
Each was painted with turquoise chalk paint & then embossed with the leaf pattern using  grunge paste through a leaf mask from creative expressions.
While the Grunge paste was still wet I sprinkled it with one of the gorgeous new colours of embossing powders by Wow! called Long Island Teal which we are now stocking in the shop along with the other new colours.
This was then heated with a heat tool causing the paste to bubble & the powder to sink in & also end up with a layer of gorgeous gold sparkly teal on the surface.


We stamped branches & owls & coloured them with promarkers.
These are both stamps by Creative Expressions.
We coloured 3 owls & cut & layered them up with 3d foam.
The little punched heart was also heat embossed with one of the new powders from Wow!. This colour is a fab pinky red called Florida Sunset.


To finish, we added the 'thank you' sentiment made using a Wow! stamp, some stamped & coloured leaves & some small punched flowers embossed with Wow! Mulberry mist with pearl PVA centres.

Daisy wanted to write her own message on each of them so I drew some lines on some turquoise card & once she'd written what she wanted to say, we stuck them to the back of each canvas with some ribbon in between to hang.


Thanks for taking the time to visit my little blog.
Please leave me a comment if you can as I always read them & they are greatly appreciated.

See you again soon 

Amy x 

Tuesday, 30 June 2015

Live Your Dreams

Welcome back blog friends. I hope you're all enjoying the beautiful sunshine we've been having recently?.
Hopefully it will now continue, fingers crossed into July when we get to take our annual holiday in beautiful Dorset.

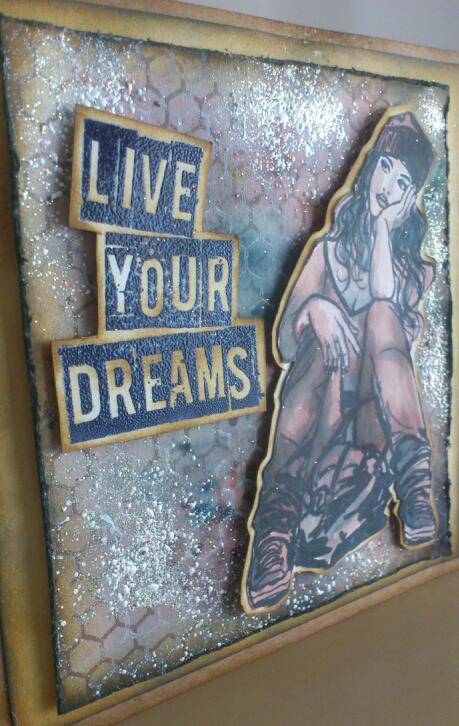
Today I'm sharing a card I made using the Lost In Thought stamp from Indigoblu.


I created the background with black & brown Brusho paints, over stamped with Honeycomb Background using white paint & sepia versafine ink.
I distressed around the edges with a pair of scissors & blended brushed corduroy & black soot distress inks.
Stampendous shabby white Frantage was sprinkled here & there to add some texture & light.


I stamped the girl in black & used the Brushos as watercolours to paint her. I was aiming for a kind of grungy look.
I cut around her leaving a few millimetres around the edge.
She was then mounted onto the background, to the right with 3d foam.


The Live Your Dreams sentiment from Visible Image was stamped in black & heat embossed with clear powder, cut out & distressed with brushed corduroy. 
This was then added to the background with 3d foam.


I mat & layered onto card distressed with brushed corduroy & then onto a craft card card blank.

I think this card would be great to give a teenager, maybe off to college or uni.

Finally, here's a picture of me with my little Oompa Loompa!


Her school had a float in the Chipping Sodbury Festival procession the theme of which was Musicals & they chose Charlie & The Chocolate Factory.

See you again soon
Thanks for visiting

Amy x 


Friday, 19 June 2015

' Over the Rainbow ' Chipping Sodbury Festival workshop 2015

Welcome back.
 Today I'm sharing the project my half of our Out Of The Blue craft group made for the Chipping Sodbury Festival.
Every year in June, over the period of about a week, the town & community get together to share various events in the town.
There is always a theme & the week culminates in a Street carnival complete with floats & a carnival princess!.
This year's theme is 'Musicals' & we decided to choose The Wizard Of Oz as the theme for our card making workshop which took place yesterday evening.
The perfect stamp set for the occasion was yet another from Visible Image, my current stamps of the moment!.

Here's the card my half of our crafty group made


I loved colouring Dorothy with my Inkense pencils. They give such vibrant colour results & for this particular image I much preferred the effect of these watercolour pencils in comparison to another Dorothy that I had coloured using promarkers.
The design for the yellow brick road & scenery was created using a Sheena Douglas mask & the Brick Wall stamp from Visible Image.
For the grass I used the Tall Grass stamp & the Winter Tree stamp for the trees.


Distress inks used were Shabby Shutters, Pine Needles, Mustard Seed, Festive Berries, Peacock Feathers, Chipped Sapphire, Dusty Concord.
Dorothy's ruby slippers were embossed with Stampendous red glitter embossing powder & touches of red stickles added the final touches to the trees & poppies.


Everyone really enjoyed the Workshop & we are now planning the projects for July & August dates.

Thanks for stopping by, hope you all have a fab weekend. I have a rare Saturday off as its Daisy's first time on the float for her infant school. Can't wait to see all the little ones dressed up as Umpa Lumpas from Charlie & the chocolate factory!!

Amy x 


Monday, 15 June 2015

You Rock Finley!

Hi everyone, sorry its been a while since my last post.
 Things have been busy as usual in the land of Out Of The Blue with lots of sorting & planning for our Summer Sale which is coming up shortly.

Also in June we will be holding our card making workshop for the Chipping Sodbury Festival. This year's theme for our workshop is The Wizard Of Oz for which we'll be using stamps by Visible Image.

Today, the card I'm sharing was also made with Visible Image stamps. You may have noticed, I'm really enjoying using their stamps at the moment!?. 


This card was made for my Godson Finley for his 10th birthday.
His mum asked if I could make it so that after his birthday it could be framed to hang in his bedroom.
His favourite colours are red & green so, of course I had to incorporate those. 
I used the Max Rocks stamp set, promarkers to colour Max, Brusho paints, distress inks, Time Holtz alphabet stencil & Visible Image Grunge Check Background stamp.


I really enjoyed making this card and hope you like it too. 
Brushos are fun to use & are featuring on lots of blogs at the moment.
 We are now stocking them in the shop so it was great to get my hands on a set of 12 colours & have a bit of a play around with them. Watch this space for more projects featuring Brushos!.


Thanks for stopping by & I promise to be a better blogger & make a massive effort to check out what you've all been creating since my last visits & comments.

See you again soon

Amy x